|
Author
|
Topic: tutorial for shading fur!
|
Stefanie
Member

Member # 293

|
 posted 22-03-2005 12:12 AM
     
I decided to make a tutorial on shading and creating fur, so I hope you all enjoy and I hope it helps! I will put comments inbetween the pics!  ok first, when you have selected which pose you'd like to shade, go to (image, mode and switch it to RGB colors) otherwise you won't be able to shade in color. after you are finished that go to the next step:  pick out your base colors by using the color selector, if you already know your color codes then type them in the box at the bottom where it says "# and a bunch of numbers and letters" of the color selector box and set up your base colors.  once you've chosen your base colors, now its time to select where you want your markings, the magic wand tool works well for areas that dont have any broken lines, if they do, you'll end up selecting other areas with it, so if you have that problem, or you want to create your own markings I would suggest the polygonal lasso, that will allow you to select an area of your desire, such as the area I outlined in red...I also outlined the polygonal lasso if you are not sure what it is,  now place your base colors in the areas that you desire, with the paint bucket of course, so that he is all set for the next step! you'll hafta excuse my goofy arrows hehe ^.^  ok, now, select the area you want to shade first using the magic wand, remember to keep that area selected the whole time till you are finished shading it completely, otherwise you wont' be able to select it fully later, as for shading we will not sure the burn tool at all whatsoever, it isn't a good tool to use, for sometimes it causes colors to turn greyish, and sometimes it is too much, so I suggest that for your darkest color use the color dropper and pick the base color you are working on, then use the color picker box and go to your darkest, now, once you have that picked out, start by using the paintbrush making strokes, think fur, as you are doing this, I highlighted what your brush size should be for this, as well as other options, make sure you keep in mind fur! hehe. also know where your light goes, since his tail is curled that area will be darker.  keep layering going lighter and ligheter each time, slowly make your brush size smaller, as well. It looks odd now, but you wait, it'll get better.  ok last but not least, select the dodge tool and add some light to the outside layer, this will allow you to blend light fur into the dark areas a lot easier later, as well as create a sense of realism [ 21-12-2005: Message edited by: Stefanie ]
--------------------

Posts: 59 | From: New Mexico! (sarcastic "wooo") | Registered: Feb 2005 | IP: Logged
|
|
Stefanie
Member
Member # 293
|
posted 22-03-2005 12:12 AM
 ok now, grab that blur tool and blur the layers into each other, I have circled what the settings should be at the top as you can see.  ok now, I kinda jumped here, and didn't show the detail of how the fur was made, my bad but I do show it later, I shall explain it before hand however. Take your smudge tool, and slowly make strokes like you are drawing grass, small strokes, very your smudge from 1 pt to 2 or 3 pts. make sure you are following the direction of the tail, and how the fur goes, think fur. blend the layers into each other, bringing the light areas into the dark ears and visa versa.  here is a zoomed out version of the finsihed tail. more to follow....
--------------------
Posts: 59 | From: New Mexico! (sarcastic "wooo") | Registered: Feb 2005 | IP: Logged
|
|
Stefanie
Member
Member # 293
|
posted 22-03-2005 12:14 AM
ok computer blinking out on me...
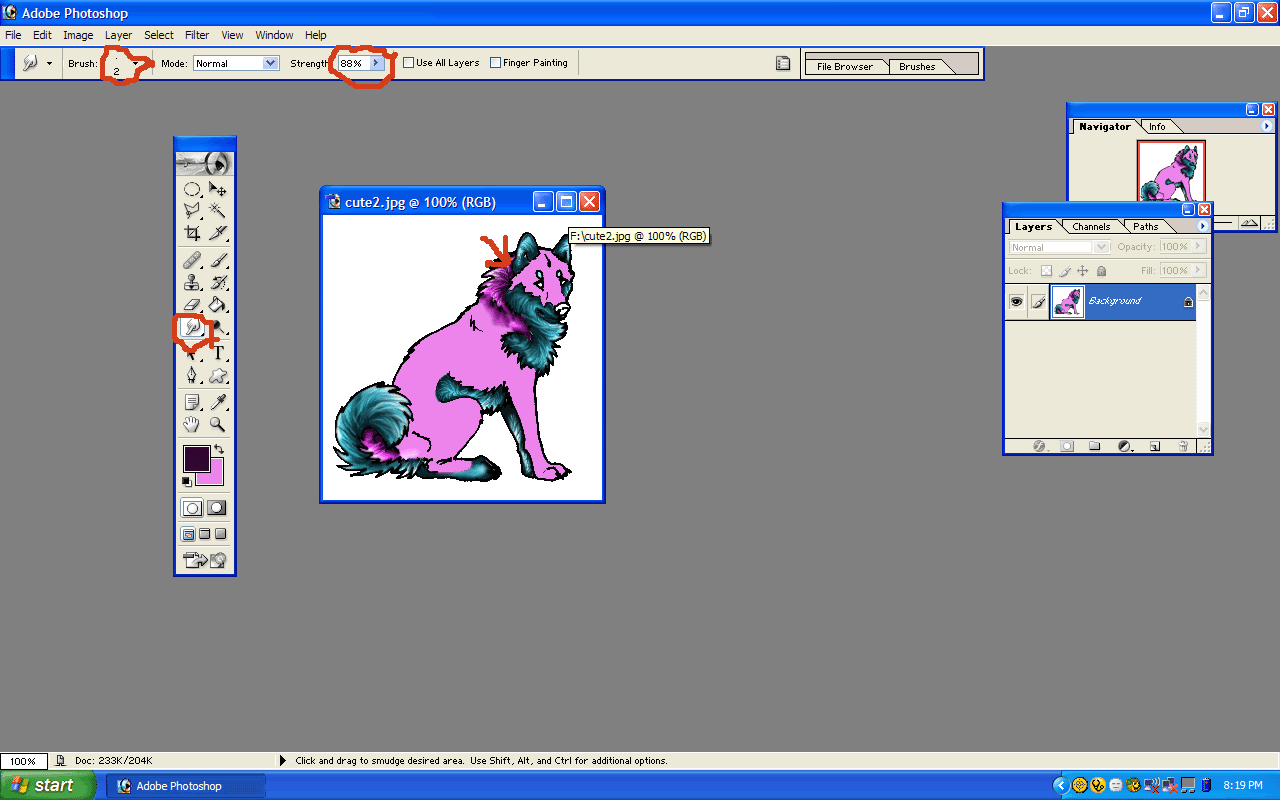
ok now like the image above, begin on the rest of the body, remember to use the magic wand and keep that area selected till you are finished! 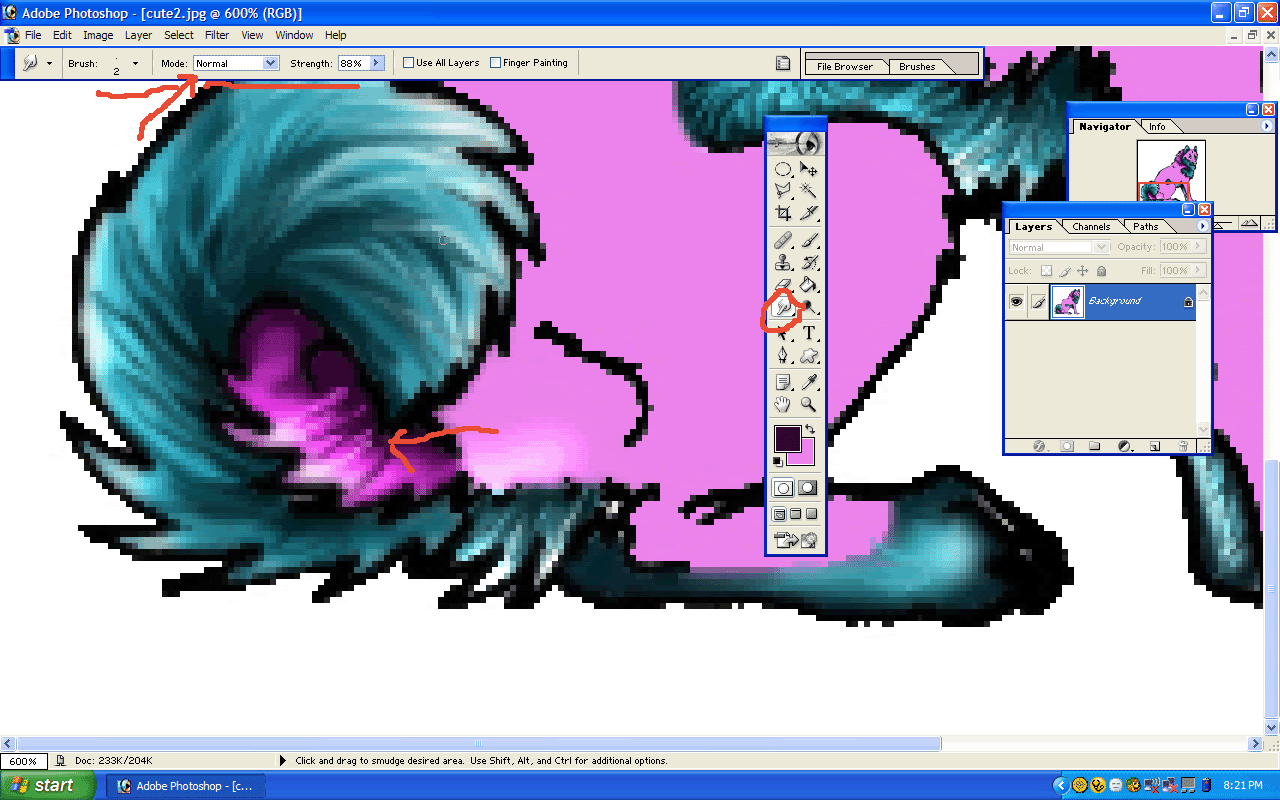 here is that close up version of how to do the tail I promised you, see how I started with thin strokes, keep doing that until it is completely finished, remember to step away from the drawing, look at it at actual size, and zoom in, make sure that it looks good as a whole. be picky! 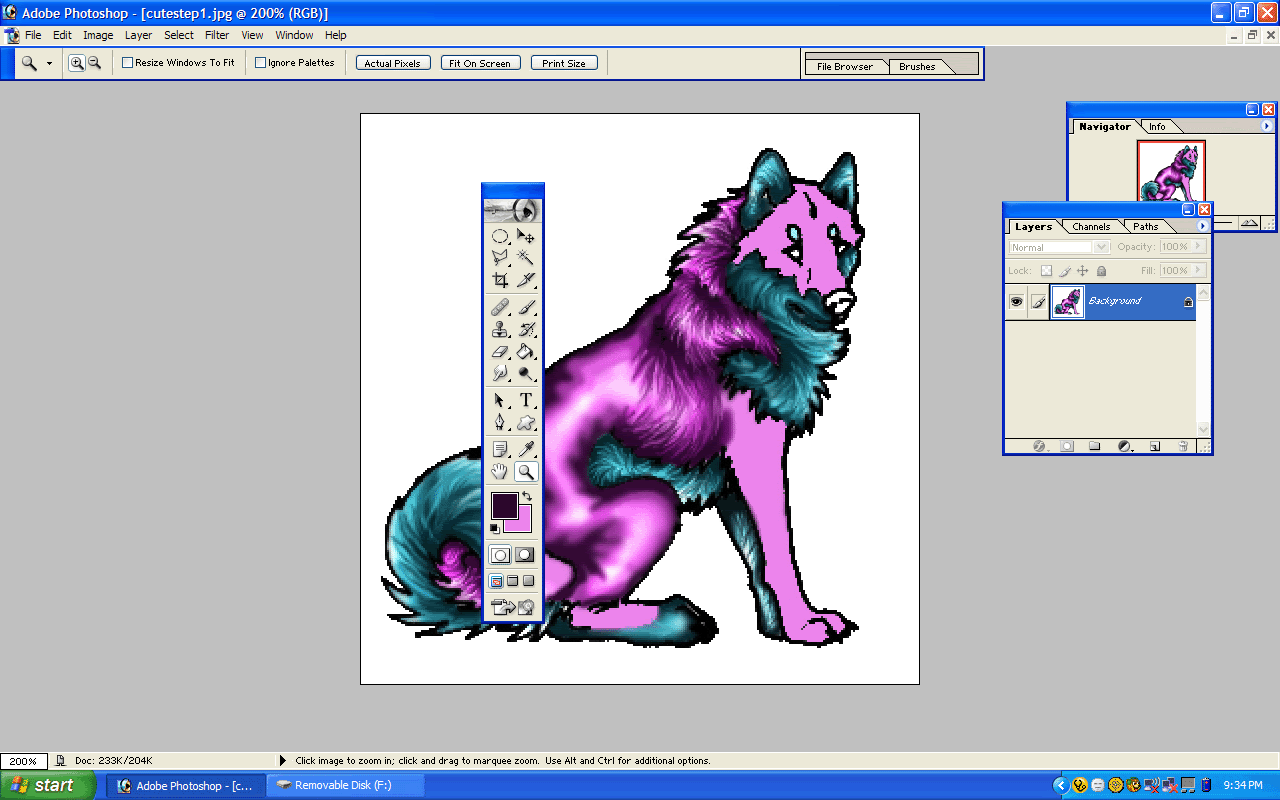 as we did with the tail, make sure you are putting your layers on as shown in this picture, layers are important, layers, then blur and then fur! 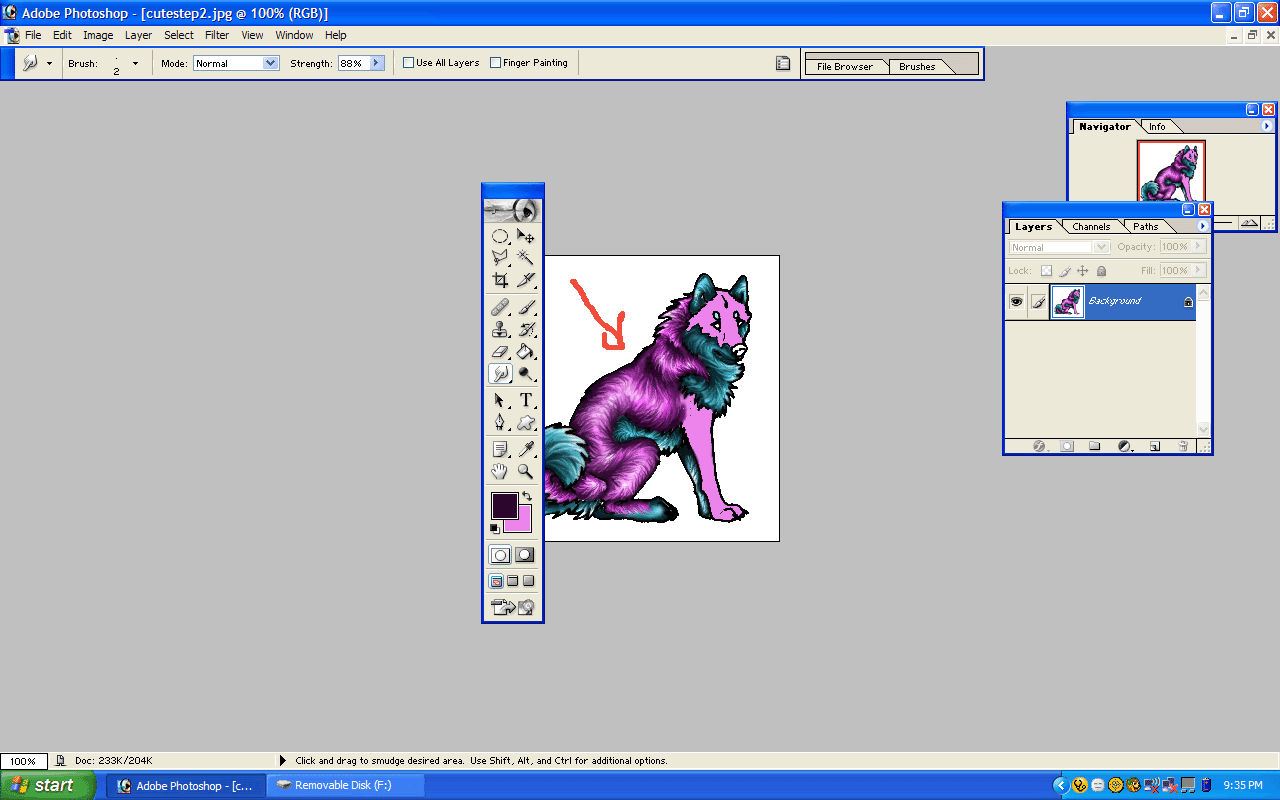 keep layering the fur, blending your lights with darks and such, remember though to keep in your head exactly where the light is coming from, see your doing great already!!! 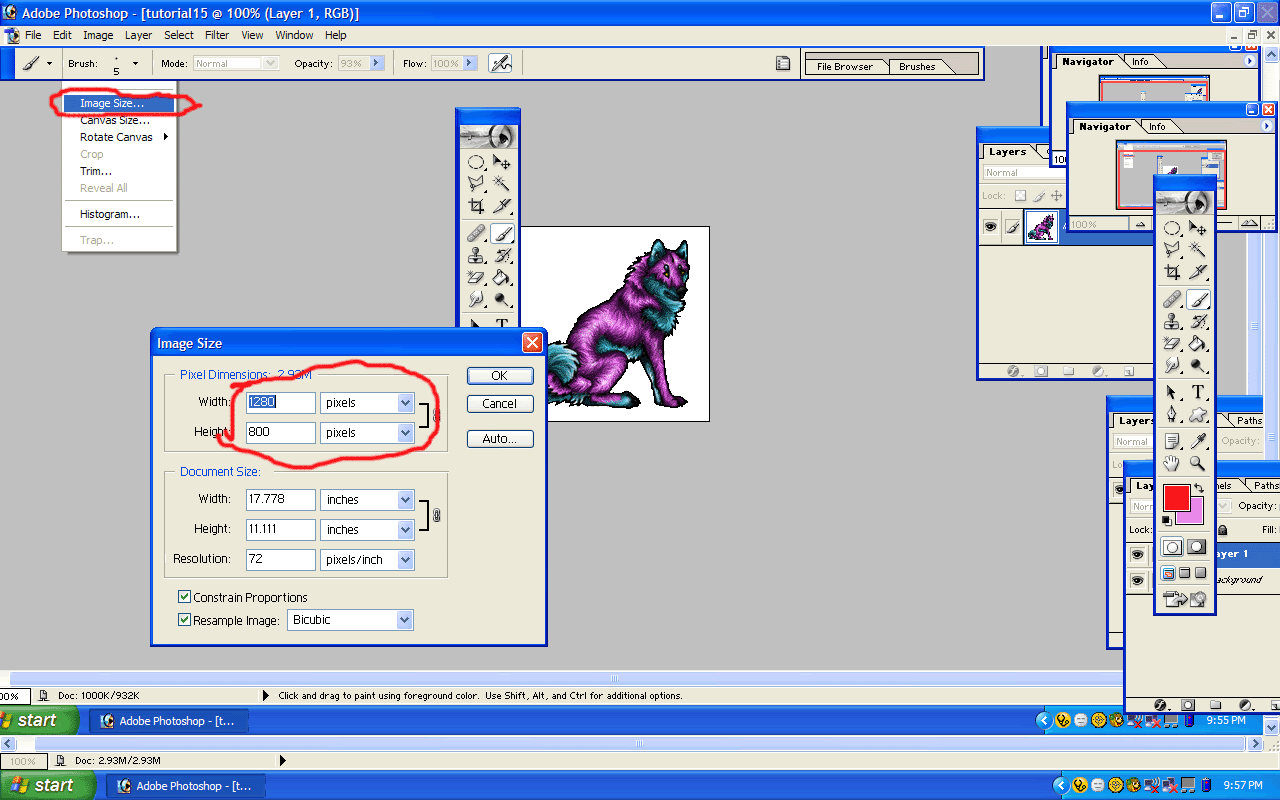 once you are finished with the entire body, now it's time to check the outline and remove the background, make sure the outline is solid black, if it isn't try using the stroke tool in the Edit menu, and then make sure you use the outside choise, with one pixel, also make sure the backgroudn of your pose is selected! then size the pose by using the image size, if you aren't careful you'll loose quality, you may hafta re-line it with the stroke tool though. now to remove the background... 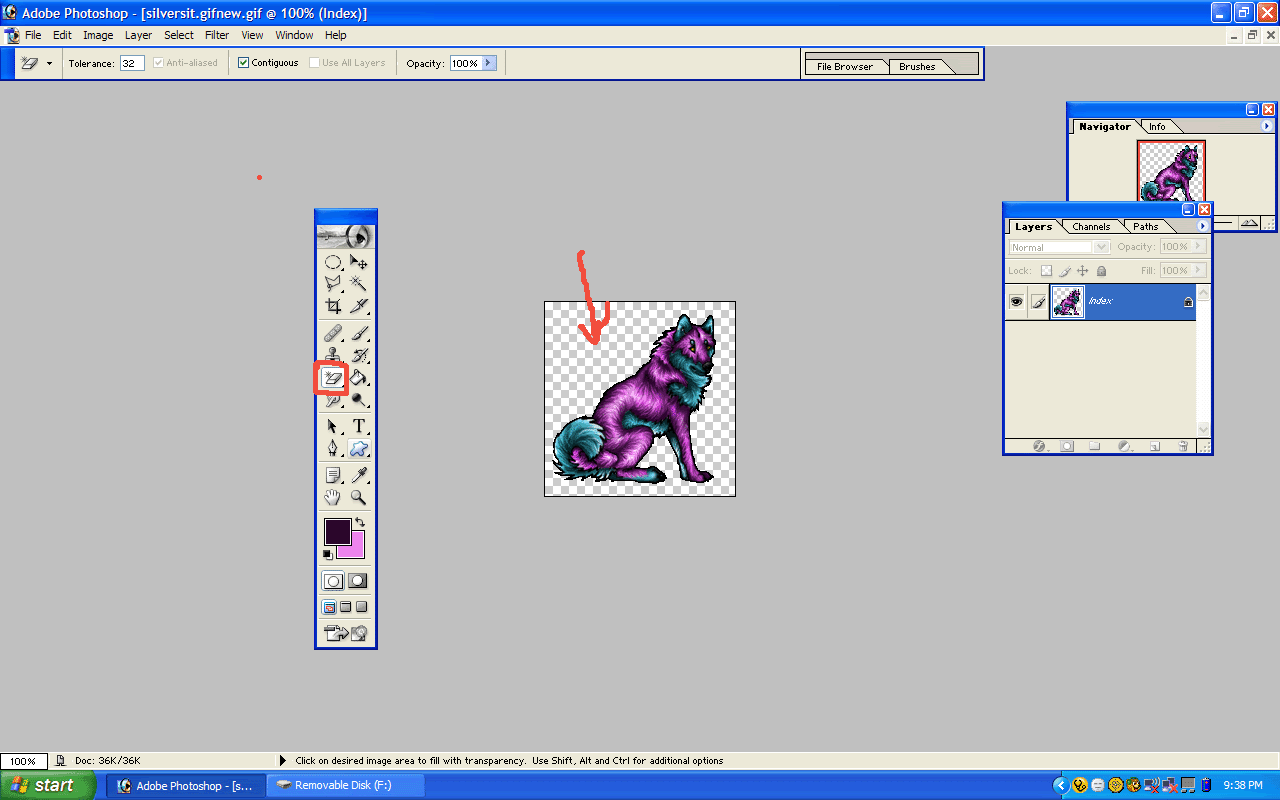 select the background and use hte magic earser tool, and earase each area, then once all the background it gone, use the paint bucket to fill it in with a different color to make sure there are not any loose pixels, if there are, make sure to get rid of them, check the size once more, and if all is set you are done!this was originally written for a avatar chat where you have wolves, so resizing and making the background transparent isn't necessary hehe hope this helped you
--------------------
Posts: 59 | From: New Mexico! (sarcastic "wooo") | Registered: Feb 2005 | IP: Logged
|
|
|
|
|
|
|
|
|
|
|
|
|
|
|
|
|
|
|
|
|



 My Profile |
  Register |
  Search |
  FAQ |
FAQ |  Forum Home


 UBBFriend: Email this page to someone!


